
Your cart is currently empty!
Author: Joey
-

How to Setup WireGuard VPN on Rocky 9 Linux
Subscribe to 22halomedia YouTube Channel
Read this same article on the Rocky Linux Documentation website
Introduction
WireGuard is a free and open-source peer-to-peer (P2P) Virtual Private Network (VPN). It is a lightweight and secure modern alternative to conventional VPNs with large codebases that rely on TCP connections. Since WireGuard is a P2P VPN, each computer added to the WireGuard network communicates directly with each other. This guide uses a hub-spoke model, with a WireGuard peer assigned a public IP address as a gateway to pass all traffic. This allows WireGuard traffic to bypass Carrier Grade NAT (CGNAT) without enabling port-forwarding on your router. This requires a Rocky Linux system with a public IP address. The easiest way to achieve this is to spin up a virtual private server (VPS) through a cloud provider of your choice. At the time of writing, Google Cloud Platform offers a free tier for its e2-micro instances.
Prerequisites and assumptions
The minimum requirements for this procedure are the following:
- The ability to run commands as the root user or use
sudoto elevate privileges - A Rocky Linux system with a publicly accessible IP address
Installing WireGuard
Install Extra Packages for Enterprise Linux (EPEL):
sudo dnf install epel-release -yUpgrade system packages:
sudo dnf upgrade -yInstall WireGuard:
sudo dnf install wireguard-tools -yConfiguring WireGuard Server
Create a folder to put your WireGuard configuration files and keys:
sudo mkdir -p /etc/wireguardCreate a configuration file with a name of your choice ending with the
.confextension:Note
You can create multiple WireGuard VPN tunnels on the same machine, each using a different configuration file, network address, and UDP port.
sudo touch /etc/wireguard/wg0.confGenerate a new private and public key pair for the WireGuard server:
wg genkey | sudo tee /etc/wireguard/wg0 | wg pubkey | sudo tee /etc/wireguard/wg0.pubEdit the configuration file with your editor of choice.
sudo vi /etc/wireguard/wg0.confPaste the following:
[Interface]
PrivateKey = server_privatekey
Address = x.x.x.x/24
ListenPort = 51820
You must replace the
server_privatekeywith the private key generated earlier. You can view the private key with:sudo cat /etc/wireguard/wg0Next, you will need to replace
x.x.x.x/24with a network address within the private IP address range defined by RFC 1918. The network address used in this guide is10.255.255.0/24.Finally, you can choose any UDP port to accept connections with WireGuard VPN. UDP port
51820is used for the purposes of this guide.Enable IP forwarding
IP forwarding allows the routing of packets between networks. This allows internal devices to communicate with each other through the WireGuard tunnel:
Turn on IP forwarding for IPv4 and IPv6:
sudo sysctl -w net.ipv4.ip_forward=1 && sudo sysctl -w net.ipv6.conf.all.forwarding=1Configure
firewalldInstall
firewalld:sudo dnf install firewalld -yAfter installing
firewalld, enable it:sudo systemctl enable --now firewalldCreate a permanent firewall rule allowing traffic on UDP port 51820 in the public zone:
sudo firewall-cmd --permanent --zone=public --add-port=51820/udpNext, traffic from the WireGuard interface will be allowed to other interfaces in the internal zone.
sudo firewall-cmd --permanent --add-interface=wg0 --zone=internalAdd a firewall rule to enable IP masquerading on internal traffic. This means that packets sent between peers will replace the packet IP address with the server’s IP address:
sudo firewall-cmd --permanent --zone=internal --add-masqueradeFinally, reload
firewalld:sudo firewall-cmd --reloadConfigure WireGuard peer
Since all computers in a WireGuard network are technically peers, this process is nearly identical to configuring the WireGuard server, but with slight differences.
Create a folder to put your WireGuard configuration files and keys:
sudo mkdir -p /etc/wireguardCreate a configuration file, giving it a name of your choice, ending with the
.confextension:sudo touch /etc/wireguard/wg0.confGenerate a new private and public key pair:
wg genkey | sudo tee /etc/wireguard/wg0 | wg pubkey | sudo tee /etc/wireguard/wg0.pubEdit the configuration file with your editor of choice, adding this content:
[Interface]
PrivateKey = peer_privatekey
Address = 10.255.255.2/24

[Peer]
PublicKey = server_publickey
AllowedIPs = 10.255.255.1/24
Endpoint = serverip:51820
PersistentKeepalive = 25
Replace
peer_privatekeywith the peer’s private key stored in/etc/wireguard/wg0on the peer.You can use this command to output the key so you can copy it:
sudo cat /etc/wireguard/wg0Replace
server_publickeywith the server’s public key stored in/etc/wireguard/wg0.pubon the server.You can use this command to output the key so you can copy it:
sudo cat /etc/wireguard/wg0.pubReplace
serveripwith the public IP of the WireGuard server.You can find the server’s public IP address using the following command on the server:
ip a | grep inetThe peer’s configuration file now includes a
PersistentKeepalive = 25rule. This rule tells the peer to ping the WireGuard server every 25 seconds to maintain the VPN tunnel’s connection. Without this setting, the VPN tunnel will time out after inactivity.Enable WireGuard VPN
To enable WireGuard, you will run the following command on both the server and peer:
sudo systemctl enable wg-quick@wg0Then start the VPN by running this command on both the server and peer:
sudo systemctl start wg-quick@wg0Add the client key to the WireGuard server configuration
Output the peer’s public key and copy it:
sudo cat /etc/wireguard/wg0.pubOn the server, run the following command, replacing
peer_publickeywith the peer’s public key:sudo wg set wg0 peer peer_publickey allowed-ips 10.255.255.2Using
wg setonly makes temporary changes to the WireGuard interface. For permanent configuration changes you can manually edit the configuration file and add the peer. You will need to reload the WireGuard interface after making any permanent configuration changes.Edit the server’s configuration file with your editor of choice.
sudo vi /etc/wireguard/wg0.confAdd the peer to configuration file. The contents should look similar to below:
[Interface]
PrivateKey = +Eo5oVjt+d3XWvFWYcOChaLroGj5vapdXKH8UZ2T2Fc=
Address = 10.255.255.1/24
ListenPort = 51820

[Peer]
PublicKey = 1vSho8NvECkG1PVVk7avZWDmrd2VGZ2xTPaNe5+XKSg=
AllowedIps = 10.255.255.2/32
Bring interface down:
sudo wg-quick down wg0Bring interface up:
sudo wg-quick up wg0View WireGuard interfaces and test connectivity
You can view WireGuard information on both the server and peer with:
sudo wgYou can test connectivity by sending a ping to the server from the peer:
ping 10.255.255.1Conclusion
Following this guide, you have successfully set up a WireGuard VPN using the hub-spoke model. This configuration provides a secure, modern, and efficient way to connect multiple devices across the internet. Check the official WireGuard website.
Articles to Read Next
How to Setup WireGuard VPN on Rocky 9 Linux
Secure Remote Support on LAN with x11vnc over SSH on Rocky Linux
How to Install Virtual Box and Answering “What is a Hypervisor?”
How to Enable Bidirectional Shared Clipboard on VirtualBox VM
How to Create a Linux VM with VirtualBox
Affiliate Links
Form your business with Northwest registered agent
Create a website with namedotcom
Secure your website with Wordfence
Affiliate Disclaimer
Please note that my website and content may contain affiliate links. This means that when you click on these links and make a purchase, I may earn a commission. Rest assured, all the products I promote are ones that I believe to be of high quality, and I personally use them as a consumer myself. Your support through these links helps me continue to create valuable content. Thank you for your support!
- The ability to run commands as the root user or use
-

Download and Install Windows Updates from the CLI With PowerShell
Subscribe to 22halomedia YouTube Channel
Introduction
Whether there is a remote machine you need to update, or you just want to update your local machine from the CLI for fun, learning how to install Windows updates using PowerShell is a useful and time-saving skill!
Open Powershell
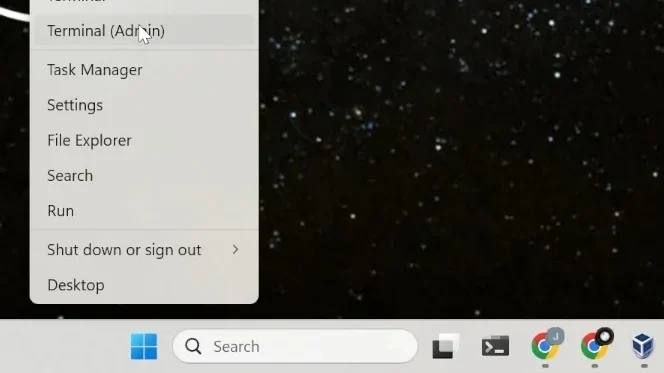
You can open PowerShell by right-clicking the Windows Start Menu and selecting either Terminal (Admin) or PowerShell (Admin).
Allow Scripts to Run
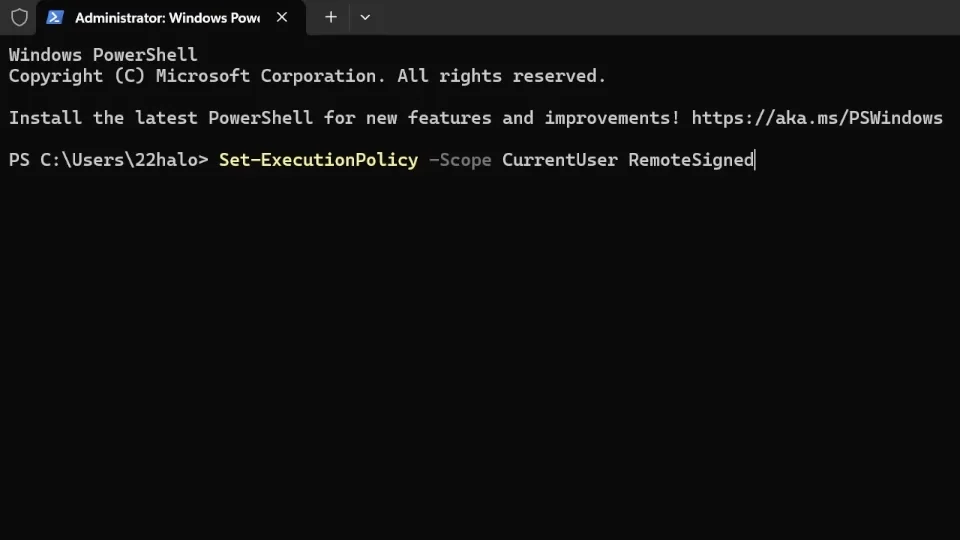
You will need to set the execution policy on your system to allow scripts to run.
Set-ExecutionPolicy -Scope CurrentUser RemoteSignedInstall PSWindowsUpdate
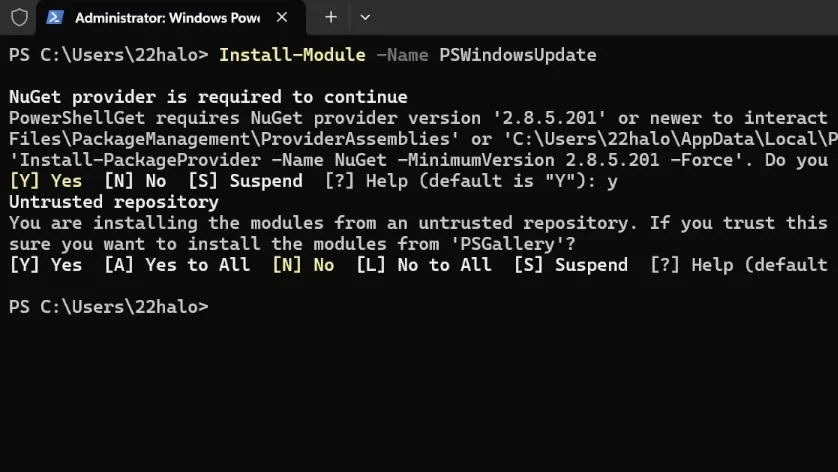
Now that you can execute scripts, it’s time to install the PowerShell module PSWindowsUpdate. Enter
Ywhen prompted for user input.Install-Module -Name PSWindowsUpdateImport PSWindowsUpdate
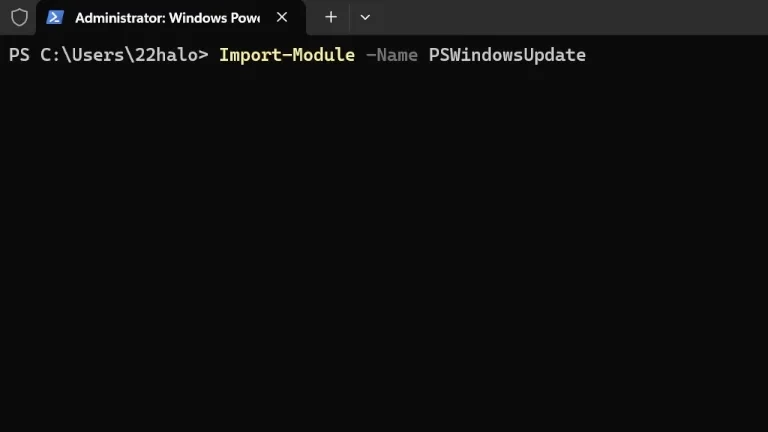
After installing PSWindowsUpdate you must install it to utilize it on your system.
Import-Module -Name PSWindowsUpdateDisplay Windows Updates
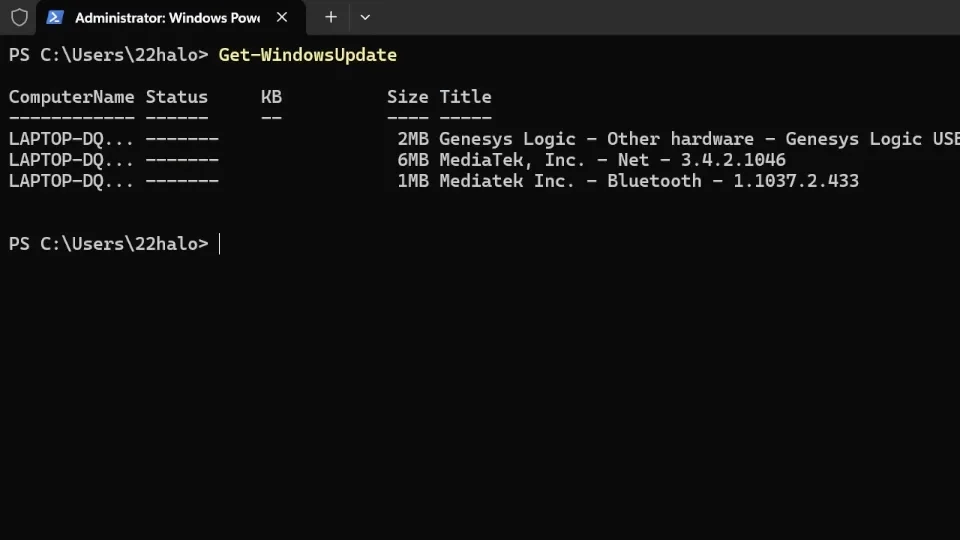
Now that PSWindowsUpdates is installed and imported on your system, run the following command to see what updates are available.
Get-WindowsUpdateInstall Windows Updates
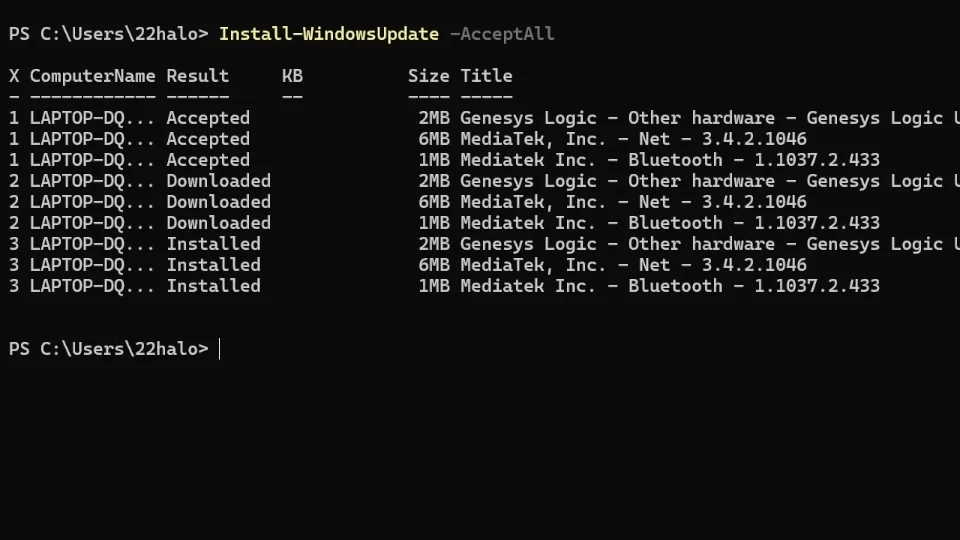
After seeing what’s available, let’s install all the updates. You can do that with the below command.
Install-WindowsUpdate -AcceptAllConclusion
Today you have learned how to install Windows updates using the PowerShell command line. This will undoubtedly prove useful in scenarios where you need to update a computer remotely without interrupting the user’s session. Or you can just do it for fun on your own machine!
Thank you for reading this article. If you found it helpful, please consider subscribing to our newsletter.
Additionally, if you’re considering starting an organization or business, creating a website, protecting your WordPress site from malware and cyber attacks, or are in the market for a new gaming laptop, checkout the affiliate links below! 22halomedia uses each of these products and is proudly partnered with these companies.
Affiliate Links
Form your business with Northwest registered agent
Create a website with name.com
Secure your WordPress website with Wordfence
Affiliate Disclaimer
Please note that my website and content may contain affiliate links. This means that when you click on these links and make a purchase, I may earn a commission. Rest assured, all the products I promote are ones that I believe to be of high quality, and I personally use them as a consumer myself. Your support through these links helps me continue to create valuable content. Thank you for your support!
-

Rocky 9 Linux HP All-in-One Printer Installation and Setup
Introduction
Printing and scanning with an all-in-one HP printer is possible on linux thanks to HPLIP.
This guide was tested with an HP Deskjet 2700 series.
See All Supported Printers to see if the HPLIP package supports your printer.
Download and Install HPLIP
HPLIP is third-party software by HP that contains necessary printer drivers. Install the 3 packages below for full support with a graphical user interface.
sudo dnf install hplip-common.x86_64 hplip-libs.x86_64 hplip-guiScanner Support
While you can scan using cli commands with the HPLIP package, they do not supply a scanner app. Install xsane, an easy to use scanner utility.
sudo dnf install sane-backends sane-frontends xsaneConclusion
After installing HPLIP and xsane you should now be able to print and scan on your all-in-one HP printer.
Articles to Read Next
How to Setup WireGuard VPN on Rocky 9 Linux
Secure Remote Support on LAN with x11vnc over SSH on Rocky Linux
How to Install Virtual Box and Answering “What is a Hypervisor?”
How to Enable Bidirectional Shared Clipboard on VirtualBox VM
How to Create a Linux VM with VirtualBox
Affiliate Links
Form your business with Northwest registered agent
Create a website with namedotcom
Secure your website with Wordfence
Affiliate Disclaimer
Please note that my website and content may contain affiliate links. This means that when you click on these links and make a purchase, I may earn a commission. Rest assured, all the products I promote are ones that I believe to be of high quality, and I personally use them as a consumer myself. Your support through these links helps me continue to create valuable content. Thank you for your support!